


Lyndsay Adler Portraiture - Experimenting with colour

Lyndsay Adler is an American portrait and fashion photographer based out of Manhattan, New York. She is best known for her work using fashion photography. Using her work she likes to express many feelings; moody, mysterious, eerie, positive and glamorous. Lyndsay is an educater as she belives that helping other with their own work/photography she can improve herself. She is greatly inspired by manyy movies and meuseum work but also people around her. Due to this, her work is always evoling and she contines to create outstanding pieces of work. She is one of the leading influeneces in the photograpic education landscape with over 700k followers on her social media platforms and 3 million views on her youtube.


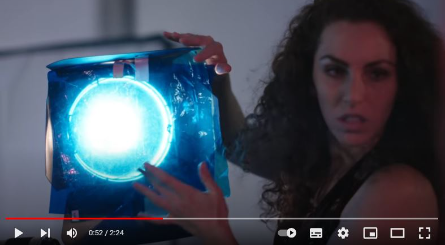
Lyndsay Adler / Colour gels and reflections
{Click on picture to see video}
|
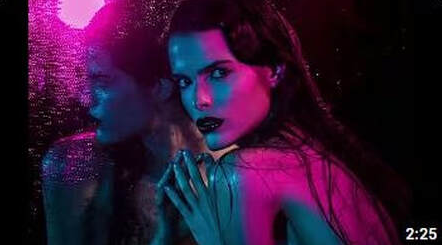
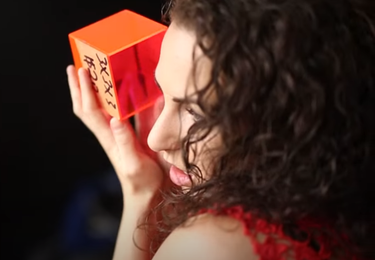
Within this video's, Lyndsay Adler shows us how she uses the technique of color gels. Colour gels are sheets of Colour plastic which are placed over the light source that is in use. In this case, she used 3 different colours during her shoot, all of them with a different coloured gel on it. She has mixed the two colours of teal and magenta to contrast with each other. To create the reflect aspect of the image, Adler places her model infront of a mirror so it creates the effect she is interacting with her reflection. For the 'night rain' effect she sprays water onto the mirror. Most of these images were taken from close behind the model but in some cases like here she is central within the image. This makes it
|
easier for us to see all of the finer details like her reflection. She tries to make her model look quite dark and mysterious while also wanting to show the elegance of her. I believe during this shoot, Adler is wanting us to feel like the model is admiring her beauty through the mirror.
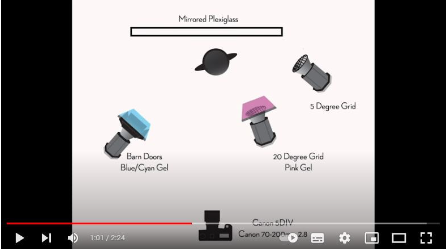
This is Lyndsay's shoot plan diagram where she shows the organisation of her shoot and where everything will be placed. During her shoot she might have moved things around to get various different shots and have more variety to chose her final image from.
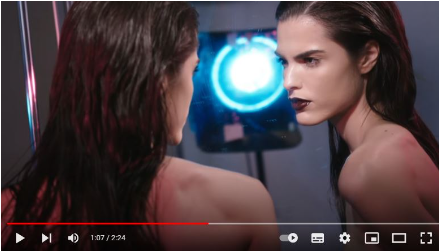
Adler positions her models in a strong and confident way while she interacts with her reflection. The model is wearing dark and bold makeup to continue the theme of strong femininity but also to complement the dark lights that are surrounding her.
|
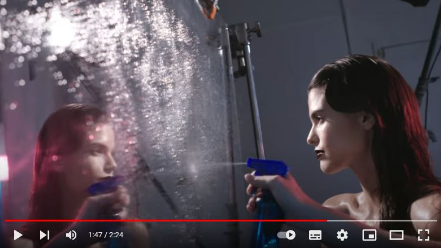
Here, Lyndsay's shows how she created the 'night rain' effect by using a spray bottle and spraying a mirror. I believe she sprays the water at the top and middle of the mirror so it fall/drip to create a more of a water effect. To improve I think she could of added water onto her model to make it more believable.
This is an example of Colour gels and how Lyndsay Adler uses them herself. She uses Colour gel filter over the lights coming from different angles during her shoot. This helps her to be dynamic with her colours and can change them rather than just having one solid coloured light.
|
Lyndsay Adler / Colour gels and shadows
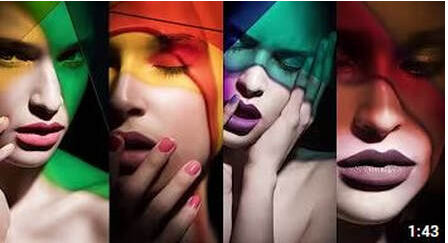
{Click picture to see video}
|
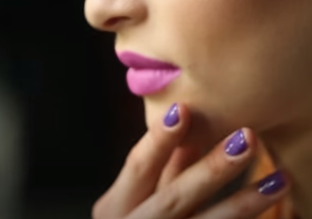
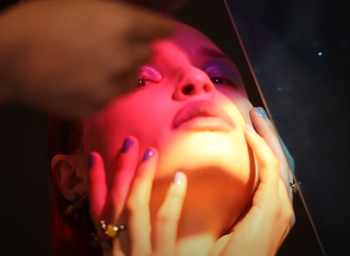
During this video, we see that the makeup, hair and nails within a photography shoot are a very important aspect as that is what the views eyes are drawn to in the beginning. Adler does this by matching them to the colours and themes of her shoot. Another important part of this shoot is the props that are used. For example, in this particular shoot it is the semi-transparent acrylic shapes. These are placed in front of the models face to project different colours and shadows.
Colour is another very key element within these images, for example the images shown have a brighter feel as they have |
contrasting colours in them. The different colours can create different feeling like sadness, happiness or even anger. During the video, Adler does not speak or say what she is setting up, she just conveys how she uses her time to plan and prepare for her shoot. From the video i can see how well this technique work and I now know how I want to emulate this.
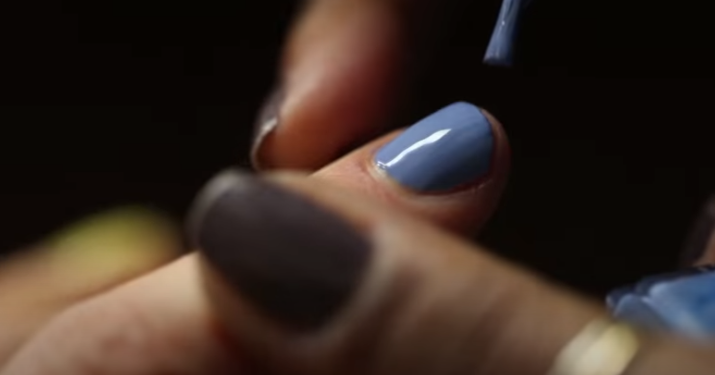
During this shoot, Adler planned and prepped how she wanted her models to look so she began by painting her models fingers with a colour that will contract with the colours of the acrylic shapes.
|
In this part of the video, we see how Lyndsay Adler focuses on how the models makeup and hair will look in the final image. She wants us to pay close attention the tones and textures to the models skins and tries to embrace them.
|
To create many different looks during this shoots she start to use objects to place in front of the models face to display shadows which will emphasis her features and will contrast with the lights surrounding her.
|
At the end of the video, we see how Alder uses two different colours of the acrylic shapes to blend with each other. This can make the final outcome so different as it can covey various emotions within one image.
|
Lyndsay Adler / Shoot Plan
For this shoot, I am taking inspiration from Lyndsay Adler and using her concept of colour and contrast to emulate her work. This shoot will be taken at school in a classroom at around midday so to get my desired lighting I will close the surrounding blinds to make it as dark as possible and use coloured artificial light to create a dark and mysterious feeling. The props I intent to use are the coloured lights, a mirror and spray bottle. I'm using a mirror to create the reflection within the images. During this shoot, I want to experiment with low key lighting and lighting up my model using lights at different angles. My equipment I will be using is my Canon 400D with a standard kit lens 18mm-55mm. I will be holding my camera as this will allow me to capture these images from various angles. Finally, to edit my images I will use PIXLR and I will focus on enhancing the colours and contrast of my final edits.
Lyndsay Adler / Contact sheet

|

|
9 Best Images Colour Gels / Initial Experiment


Editing Process Colour Gels / Initial Experiment
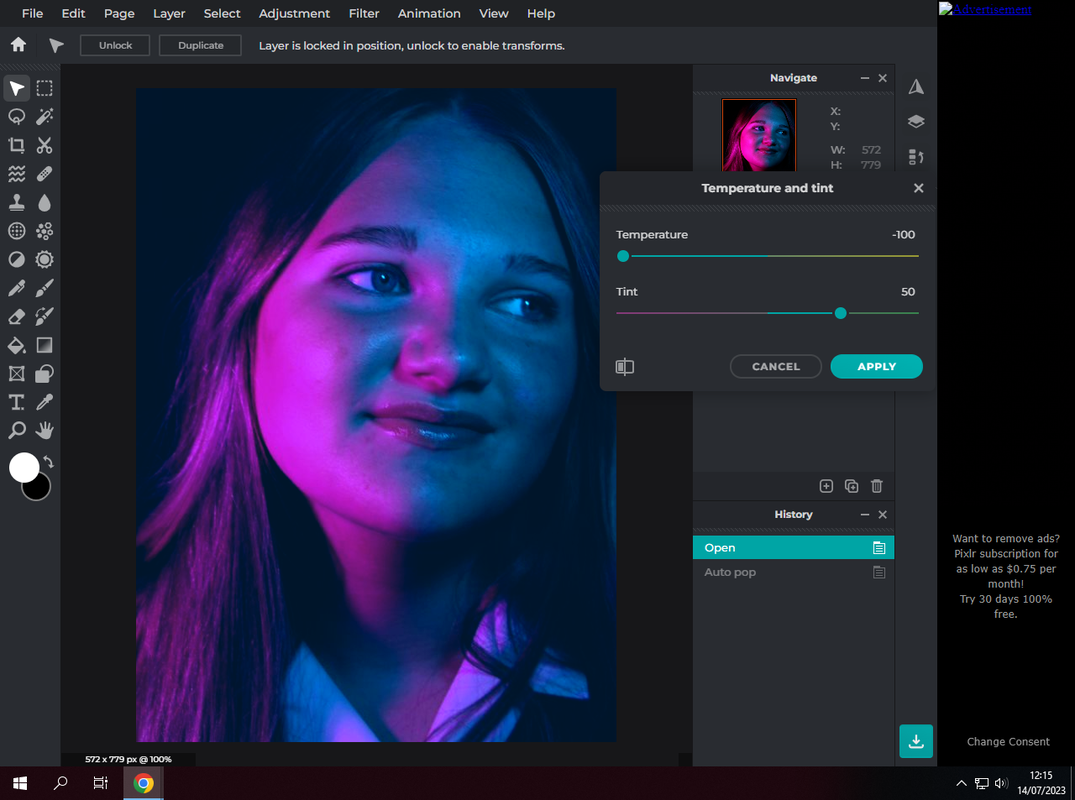
I began my editing process by selecting my image on Pixlr and choosing to adjust my temperature all the way down to -100 as I felt like my starting image was too bright and the pink and blue colour didn't contrast well together.
|
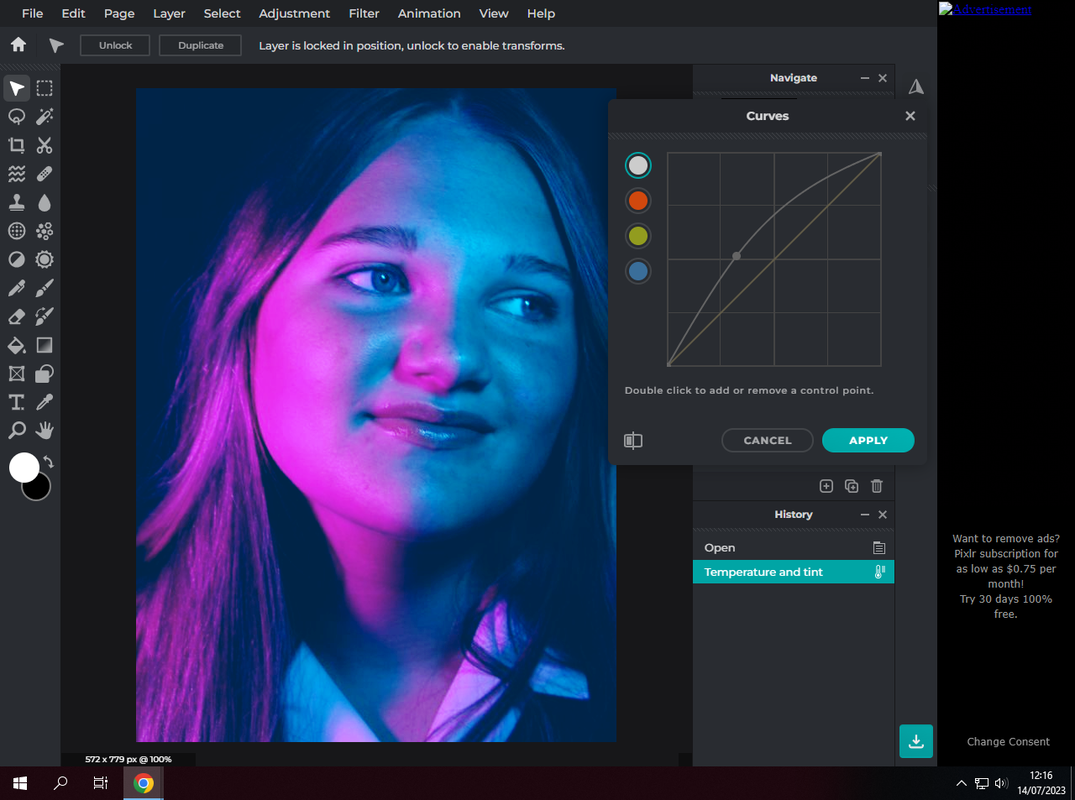
Next, I adjusted the curves of my image slightly to brighten up the right side of the models face. This meant the whole picture was more clear and could bee seen in more detail.
|
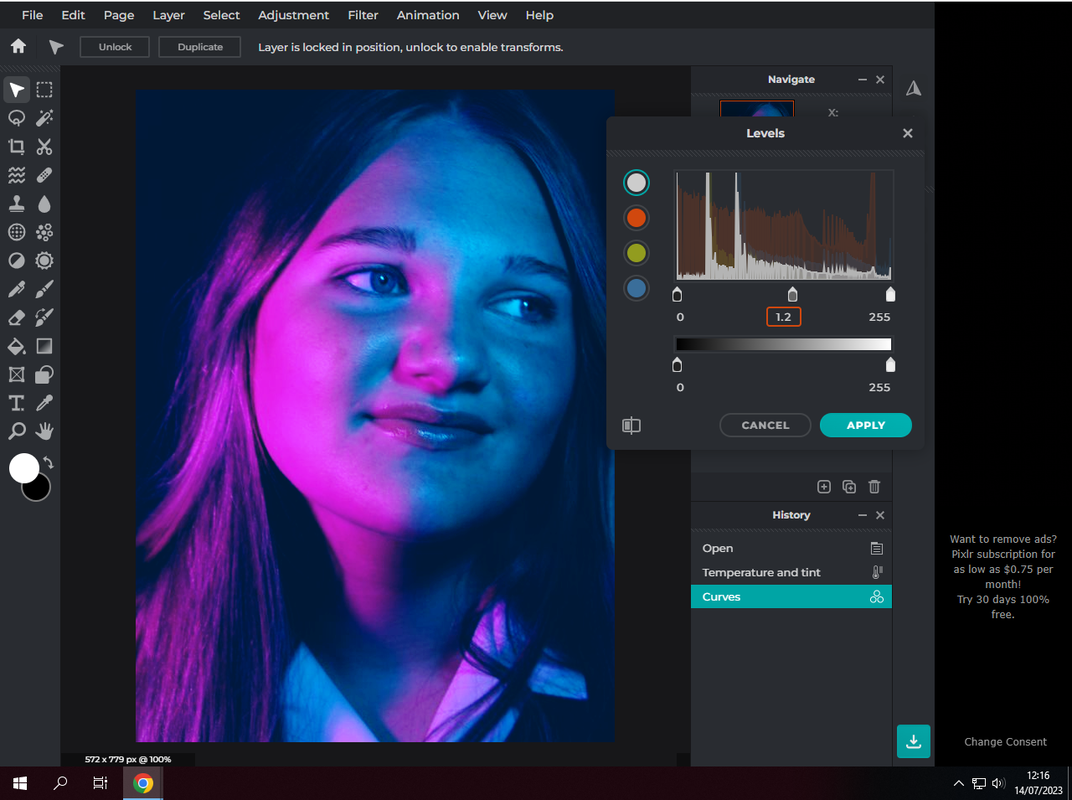
Then, I changed the levels of my image by 0.2, this made the image a little bit darker while keeping the lighter effect on one side of the models face.
|
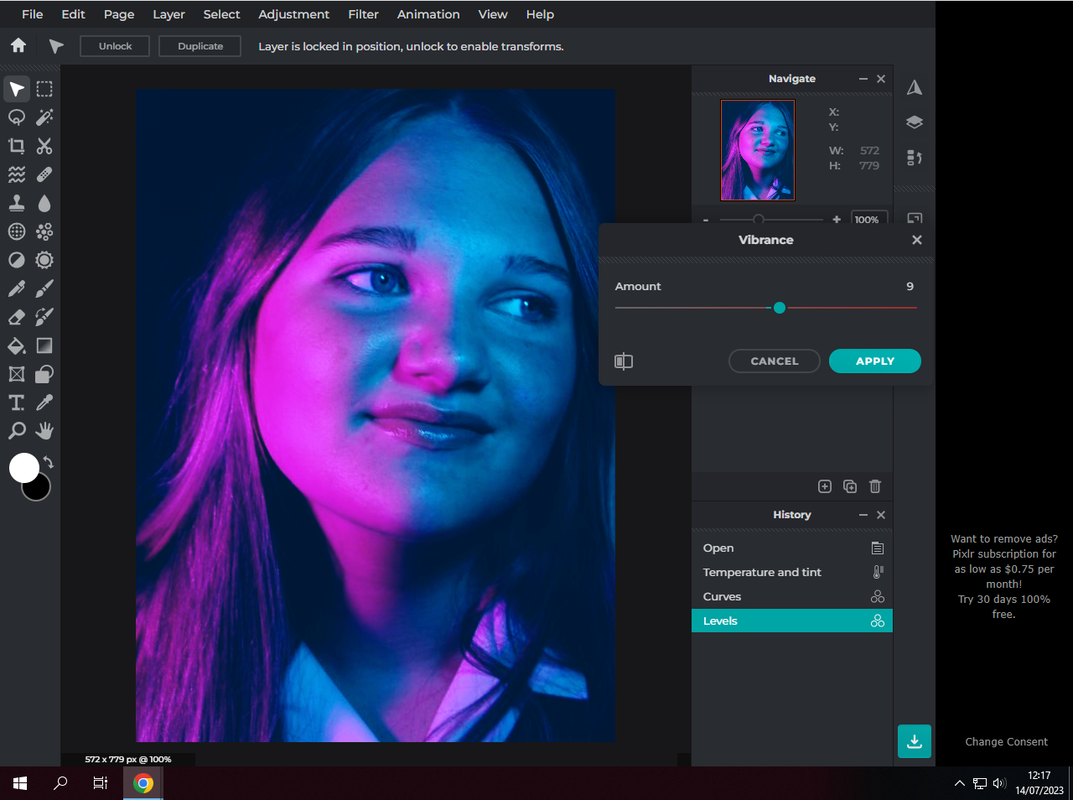
Finally, I adjusted the vibrance of my image by 1 as I made the background become slightly darker. This meant it contrasted well the main focal point of the model.
|
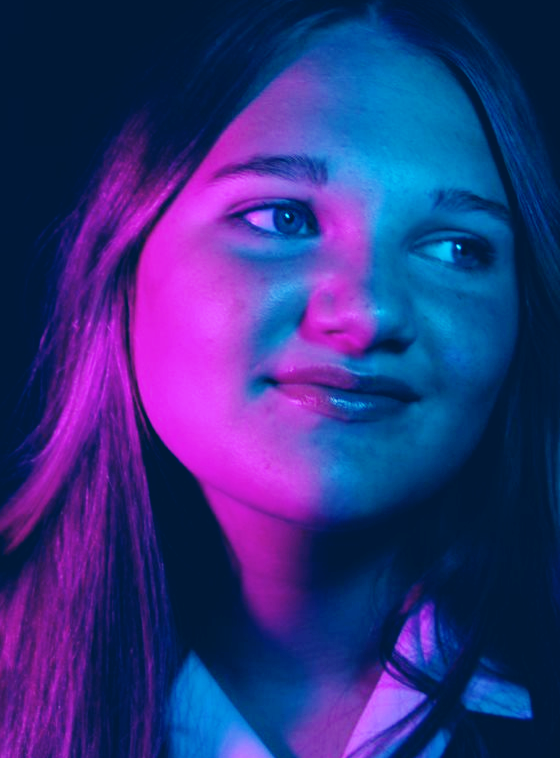
Final image:
Best image / evaluation

|
{WRITE EVALUATION HERE}
|
